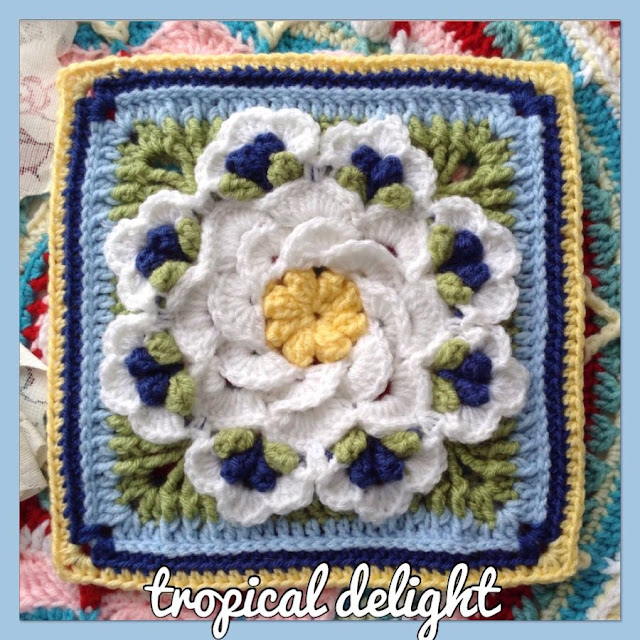
Hello girls, who here is in love with square crochet, I'm crazy about these crochet patterns, because I can create blankets, quilts, covers and more, every day I step and discover a new way of using I'm extremely happy for something so different and beautiful as well. The square is something that should be more used and shown in the crochet days passes everything is renewed and this is the trend that the crochet comes to show, each square is totally innovative and different, because it is something to build something else. What they think about square in crochet, I'm in love with them, and look that some does not generate difficulty in doing it, because it is something practical and fast. So guys, let me re-use the tips left, and I'd better leave the step-by-step and video tutorial for you to learn this kind of crochet square, do not waste time or worry about this work, I'm sure if you follow the tips will be able to do it. Let's practice, I want to see your work being released, okay. Big kiss
Here's the step-by-step explanation:
Edit 3/9: If you are looking for a dots photo tutorial, Click here.
Edit 31/03: I can not post photos of your illustrations to the pictures, but I will describe them the best I can here below:
Figure 1 shows the current-4 worked just below the next two point loops, instead of the two point loops.
Figure 2 and Figure 3 show the point being worked on in the space that is created by the first sc (so basically all popcorn points are worked on the first sc) for the first one. For the latter, they are worked on the bottom of the trc instead of the sc - then the first wrap of the trc from the bottom. In both cases, they are not worked on the foundation, but a little above that, in the bottom space of any requested point.
Figure 4: After you have made the 1 trc and 2 dc at the specified point, you will take the hook from the wire and insert it into the front and back handles of the trc. Pull the wire, put the hook back, and then pull the wire from the end of the second DC through. You will have a 3-point puff that comes slightly pointed at the end.
sh-pc-B is essentially the same, with the hook removed and placed on the trc, and then ending the point.
sh-pc-C is the same, worked at the beginning of triple crochet.
Figure 5 shows the center point on the petal. It says: "Work in front of the petal in the same dc of two previous rounds. Insert the hook from the back, facing forward in the center of st. Yo, pull through lp on the hook, sl st done. Return the hook back to the center of the st again. Come forward, to the left of st. Pull the lp on the hook. Sl st made. "
The image is of the central petal, with a slip point in the center and a sc on top of that. On both sides (one on the left, another on the right), there is a slip point.
So what you are doing here is to make the base between each outer white petal, where it connects to the fourth round of petals below. You make two slippery points at the point of the center petal point of the fourth round, behind the outline of the round slip point. The two points of slip make the end of a petal and the beginning of the next, both at the same point.
Figure 6 is simply an invisible join, which can be found on YouTube and a good amount of crochet sites.
Here is the model of a blanket built with the Tropical Delight pattern:
The video tutorial will give you a good direction on how to get started and the details quickly and fairly understood:


Nenhum comentário